I thought I’d kick off February with a SALE!

Visit my TPT store to find ALL of the products on sale!
Check out Facebook this weekend for FREEBIES too!
(100th Day, Groundhog Day, President’s Day)
I thought I’d kick off February with a SALE!
Visit my TPT store to find ALL of the products on sale!
Check out Facebook this weekend for FREEBIES too!
(100th Day, Groundhog Day, President’s Day)
I stumbled upon this cool website just recently and wanted to share. It’s called Pinky Dinky Doo. The site encourages children’s story writing. You can read all about it and see it in action just by clicking on the picture below.

I love it! It’s free and easy to navigate for your little kiddos. As you can see above, there are games, videos, printables, and story podcasts. Students can make up their own stories, the site teaches how stories are made, reads them back to the kids, and even allows them to publish and share their own story with others.
To learn more, click on “Grown Ups” when you arrive at the site.
Do you like FREE Resources for your classroom?
Silly question huh? Okay, we all love FREE resources!
Here’s a great website resource. It’s called Twinkl.

This site is similar to Sparklebox as seen below. Click on the pictures to visit both sites. Twinkle doesn’t have as much but you’ll find helpful & free resources here.
Sparklebox, on the other hand, has lots of resources but the new website can be difficult to navigate. I really like the vocabulary words on Sparklebox for kindergarten topics as you can see in this picture below.

They are now uploaded and ready to view!
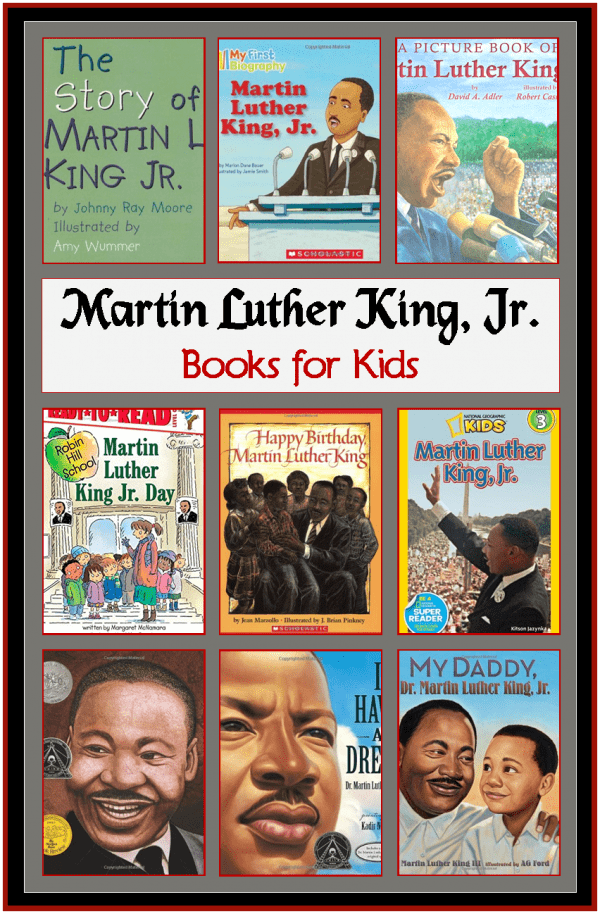
I am teaching about MLK Jr. this week. If you are too, you might want to view these videos. There are 6 different books that have been converted to short movies.
Hope you enjoy!
There’s more to come every month! Don’t forget to become a subscriber & get notifications when new videos are uploaded!
Do you use bathroom passes? Here are some I *LOVE* BUT I don’t use and I’ll tell you why below, as well as a new solution.
As we return from Winter Break it’s inevitable we will have to go over the rules of our classrooms to remind our students of routines and behavior. One of problems I run into is usually the use of the bathroom. So, read to the end for a twist on some already clever ideas and how to incorporate them into your class.

1. I just LOVE this idea! Students take the hand sanitizer to remind them to clean their hands and everyone knows the bathroom is in use. BUT, in the meantime, where do the kiddos put it? Most kids would place this on the bathroom floor where there’s lots of germs – Yuck!

2. Wrist passes! Awesome and aren’t these cute! I love themed passes, I have some too. BUT, where do these end up when the children use the potty? They get in the way if worn on the wrist or get placed on the floor and sometimes even fall in the toilet because the wristband is too big for their little hands– Yuck again!

3. This seems like a clever idea! Love it. But, does your student bathroom have door handles or hooks to hang it on? Not ours. Again, probably on the floor is where this will end up with lots of germs on it.

4. Another wonderful idea! Love this and have done this too! BUT, for kindergarteners who are small well they need a short string to avoid accidents. And, for those students who don’t like wearing it around their neck what do you do? (For example, students with special needs)
All these ideas are great and with wonderful intentions! I’ve tried them all myself with all those “yucky” things happening to them. And, students have even come back without them and they are then lost forever.
So, how do I keep track of my students and their hygiene?
You’re probably thinking this isn’t much different than the pictures above right now. So, read on to see how this works.
First, I use passes too! And, I like variety so I change them each year. They can be cute and clever ideas just like the ones above, but I added one more thing that makes this idea just a bit different.
I remove the necklace / wristbands first. Then, magnetize the back of the passes and place them on my magnetic whiteboard. You can make cute passes with your favorite clip art or cameo and laminate these too. Next to the passes, I add a large hand sanitizer bottle and it stays put there. Finally the placement of these items are at the front of the class near my whole group direct instruction area along with my guided reading table. This is important to me for awareness.
When a student needs to use the bathroom, he/she simply takes the pass off the whiteboard and places it in the tray below. Now, I know someone is going to the restroom and so do the children if they go to get the pass. (one at a time) When the student returns to put the pass back up, he/she uses the sanitizer before going back to work and puts the pass back up on the whiteboard signaling that the bathroom is available.
Viola! Now, I know who is in the bathroom and out of my classroom and I can quickly ask the returning student if he/she washed their hands and prompt them to use the sanitizer just with a quick glance from my whole group area or my guided reading table. Now, I’ve avoided having students lose my expensive passes, placing them on germy surfaces, and I can make sure their hands are all washed and sanitized just by being alert by the missing pass and sanitizer near me. Another additional plus to this method of only one student out at a time – any messes are much easier to investigate just by being able to be more aware with this method and it also alleviates everyone piling up in the bathroom for some social time!
Do you have any clever twists on this idea? Would love to hear them. You can leave comments here or on my Facebook page!
Click below.
![]()

Do you send home books for students to practice reading?
In the school district where I teach, many students don’t have access to books at their reading level. In the beginning, I also did not have access to books that I could send home for my kiddos.
So that my students could practice their sight words and CVC words in the context of reading books, I had to come up with an organized plan that worked for me and my students.
Perhaps you have a great system already or maybe you just need a new idea. Either way, this post might be helpful. And, if you have a way you think is more efficient and effective, I would love to hear from you!
Books!!!
Initially, I did not have books I could send home with the students to practice. Over time, a new adoption, and some internet research, I found some books that I could copy and send home with kids. But, I didn’t just want to copy books and send them home. So, I found ways to incorporate them into my classroom direct and indirect instructional time. That’s a post for another day along with websites to get lots of low cost or free books.
My students have to practice their books several times before ever getting to take them home. I want them to feel AND be successful when they go home to read by themselves. As you all know, not all parents participate in helping their children with homework either because they can not do it or they don’t want to do it. Therefore, I send home books that are at the student’s level of independence after the student has read the book fluently to me. That means each student reads their books as many times as it takes to be fluent before it goes home. Now for the tricky part! Organizing them.
How do you organize the books you send home with the students?
At the end of each school year, I start creating the folders you see above. To save myself time, I usually have intermediate students do this during their recess if they want to help out. I use thematic colors for each month. For example, I use red or green construction paper during the month of December simply because it helps me think of Christmas and I use blue for January (snow, arctic animals, cold weather), etc.
First, fold large construction papers in half, staple along the sides as shown in the picture above. I use 3 staples on each side. Now you have a pocket folder to stuff paper books in. If folding isn’t your thing and you don’t have volunteers to help you with this project, you may want to consider using manila folders or Ziploc gallon size bags.
Next, I copy a note to the parents along with the reading strategies I use in my classroom hoping parents will be able to help the kids and if not, the kids can help themselves with the reading strategy icons. GRAB IT FREE HERE! Either glue or staple it on. I prefer to staple although I have glued in the past. Once I have done this, I write numbers 1 through 10 on all the colors. I’ll explain this later.
Finally, these folders get stored in my filing cabinet alphabetically by student first names. Sometimes, I file them alphabetically by girls and then alphabetically by boys if I’m going to have the kids file their books so it’s easier.
Back to the Color System I Use

Above is the schedule I use. In August, I get 25 yellow sheets, fold them, and number them all “1” after stapling and adding the note. For September, I get 25 red sheets, fold them, and number them all “2” after stapling and adding the note. I continue this until all the months are complete.
All students will get a yellow #1 folder for the month of August. All books will go in this folder and when August is over, the folder gets sent home with all the books students are fluently reading. Continue doing this routine for every month.
As for the numbers, I explain to parents at Back to School night / conferences, students will end their Kindergarten year with 10 different colored folders with numbers 1 through 10. Each successive number the degree of difficulty gets a little bit harder. Therefore students can practice easier books or harder books as time goes on. I can also report to parents what folders students should read from if they are having difficulty or need more challenges thereby differentiating their homework and reading ability.
By the end of the year, each student should have approximately 200 books they have read all year and can continue to practice during the summer months. Parents have always come back to me and told me how well the folders and numbers on them worked out, how their child new just which books to read in which folders and how easy it was for them to organize and store especially during the summer vacation.
Come check out my new YouTube channel. I am in the process of uploading lots of books as videos for the month of January!
If you like, please **SUBSCRIBE** to my channel!
There will be lots of other videos uploaded for primary educators there too!

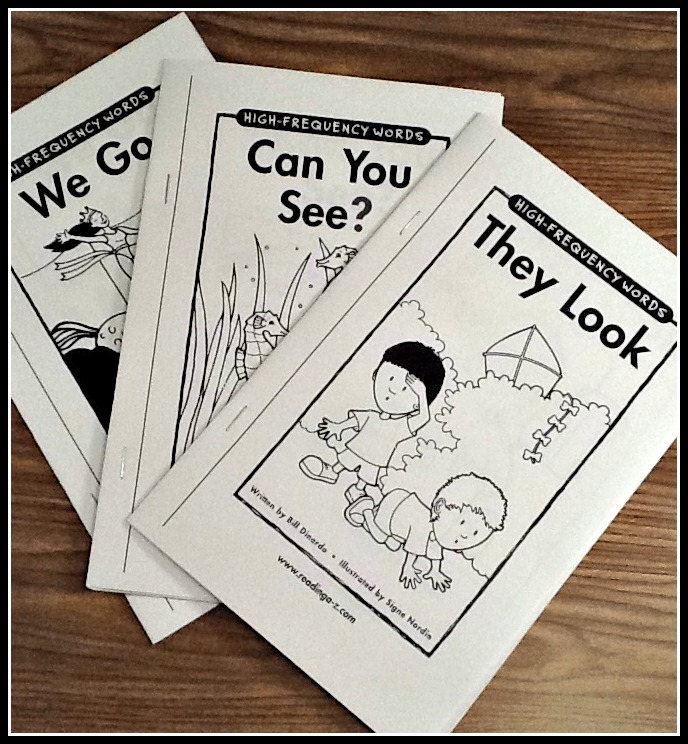
Do you need a few ideas for January book titles?
Well look no further! You can find lots of books to use this month for topics like penguins, snow, winter, arctic animals, 100th day of school, and Martin Luther King Jr. day.
Click on the picture below for lots of titles!

You can write down the titles, screenshot them or even purchase here through my site. Hope this helps you plan your month of January.
If you’re an experienced teacher you may already know these tips and tricks of the trade. But, if not, these might come in handy for you!
Did you know you don’t need Dry Erase Boards in your classroom?
All you need are tables! My students use the tables as their dry erase board all the time. It’s great for practicing words, letters, handwriting, direct draws, math or whatever else you want your kids to do with a dry erase marker.
As you can see below in the picture, I use my dry erase marker everyday! I write notes on my teacher table and teacher desk. It’s quick, especially during teaching times and I never lose my notes! Simply erase and it’s gone!

How do you use Sharpies in class?
I *HATE* floating nameplates on my students’ tables. And, when they are taped down, well they tend to pick at them and eventually, you have a mess to clean up and new nameplates to create. Time you could be using to plan your important instructional lessons.
So, use a Sharpie instead!

Once I decide on where children are going to sit (I call this their “Good Morning Table”), I write their names with a Sharpie on the table. Everyday, they begin their morning here. I love it because I don’t have nameplates to create and care for. It saves me time! But, more importantly, my students get right to work every morning because they know right where to go, they learn to recognize their name, spell it, write it, and identify the letters. Better yet, I can use this method to have students help me find others table seats, pass out journals or supplies to specific people, etc. Thus, they learn other names and letters too!

And, if I need to move someone, simple use a sponge like the one above with soap and water to scrub it off. This is a great task for a student who loves to help or a student who needs a consequence. Either way, saves you time once again!

